Deciding between DIY and professional radio installation for your aircraft involves critical considerations beyond just price. This guide provides a complete framework for evaluating the true costs, regulatory requirements, safety implications, and practical steps for both approaches. You’ll gain actionable insights to make an informed decision that balances your budget constraints with airworthiness compliance and risk management.
Quick Decision Guide: Is DIY Radio Installation Right for Your Aircraft?
Before diving into the detailed analysis, use this decision framework to determine if DIY radio installation is even a viable option for your specific situation. Several critical factors immediately rule out DIY for many aircraft owners.
The first and most significant factor is your aircraft certification type:
- Standard Category Aircraft (Part 23/25/27/29): DIY installation is generally not permitted without proper certification. The FAA restricts most avionics work to certified mechanics with appropriate ratings per FAR 43.3 and 43.7.
- Experimental/Amateur-Built Aircraft: DIY installation is typically permitted as the builder/owner has greater latitude for maintenance and modifications.
- Light Sport Aircraft (LSA): Rules vary based on the specific LSA category and manufacturer maintenance requirements.
Secondary decision factors include:
- Equipment Type: Communication vs. navigation equipment (nav equipment often has stricter requirements)
- Technical Complexity: Simple intercom vs. integrated digital systems
- Required Testing Equipment: Access to specialized tools and test gear
- Documentation Requirements: Ability to properly document the installation for compliance documentation when flying internationally
If your aircraft is certified under standard category, professional installation is almost always required by regulation. For experimental aircraft owners, proceed to the cost and risk analysis to make your decision.
Comprehensive Cost Comparison: Beyond the Hourly Rate
The true cost difference between DIY and professional installation extends far beyond simple hourly labor rates. This section breaks down all cost factors, both obvious and hidden, to provide a complete financial picture for your decision.
DIY Installation Cost Breakdown
DIY installation appears cost-effective at first glance, but requires significant investment beyond the radio itself. This comprehensive breakdown reveals the full financial picture including often-overlooked expenses.
| Category | Items | Typical Cost Range |
|---|---|---|
| Basic Tools | Wire strippers, crimpers, multimeter | $100-300 |
| Specialized Tools | Connector crimping tools, pin extraction tools | $200-500 |
| Testing Equipment | SWR meter, wattmeter, frequency counter | $150-600 |
| Documentation | Wiring diagrams, installation manuals | $50-200 |
| Materials | Specialty wire, connectors, shielding | $75-250 |
| Training/Education | Books, online courses, workshops | $100-500 |
Beyond these direct costs, DIY installations require significant time investment. Aircraft owners typically spend 3-5 times longer than professionals on the same installation. Valuing your time at even a modest rate can substantially change the cost equation.
Professional Installation Cost Analysis
Professional installation pricing structures vary widely and include several components beyond the quoted hourly rate. Understanding these components helps you evaluate and compare quotes effectively.
| Cost Component | Description | Typical Range |
|---|---|---|
| Labor Rate | Hourly shop rate | $85-150/hour |
| Labor Hours | Estimated installation time | 4-12 hours typical |
| Bench Testing | Pre-installation equipment verification | $75-200 |
| Documentation | Form 337, logbook entries, diagrams | $50-200 |
| Materials | Connectors, wire, mounting hardware | $50-300 |
| Certification | Final testing and certification | $100-300 |
Regional variations can significantly impact these costs. Urban areas and regions with few avionics shops often command premium rates, while competitive markets may offer better value.
Long-term Financial Implications
The financial impact of your installation choice extends years beyond the initial work. This analysis examines how installation decisions affect ongoing costs, aircraft value, and eventual upgrade paths.
- Insurance Impacts: Professional installations may qualify for reduced premiums with proper documentation. According to aviation insurance specialists, DIY installations sometimes face coverage limitations or exclusions.
- Resale Value: Aircraft with professional avionics installations typically command 3-7% higher resale values according to aircraft appraisers. Documentation from reputable shops serves as quality assurance for buyers.
- Annual Inspection Costs: DIY installations often face greater scrutiny during annual inspections, potentially adding 1-2 hours of billable inspection time annually.
- Future Upgrades: Forward compatibility with ADS-Out radio selection and future-proofing your aircraft is critical to consider. Professional installations often include wiring and architecture that facilitates future expansions.
Risk Assessment Framework: Safety, Legal, and Technical Considerations
Every installation decision carries multiple risk dimensions that must be systematically evaluated. This comprehensive risk assessment framework helps quantify and compare the various risk factors between DIY and professional installation options.
Safety Risk Evaluation
Radio installation errors can create significant safety hazards ranging from communication failures to electrical system issues. This systematic analysis examines the potential safety impacts and their likelihood in both DIY and professional scenarios.
Common safety-critical installation errors include:
- Improper Grounding: Can cause intermittent communication, static, or complete failure during critical flight phases
- Inadequate Wire Routing: May lead to interference, chafing, short circuits, or control system binding
- Incorrect Circuit Protection: Improper fusing can result in electrical fires or system failures
- Antenna Placement Issues: Poor positioning or installation can create dead spots in communication range
- RF Exposure Concerns: Improperly shielded installations may create unsafe RF exposure levels
At non-towered airports, reliable radio communication is essential for traffic separation. Following CTAF best practices and tips for non-towered airport operations requires dependable radio equipment.
Legal and Regulatory Risk Analysis
Installation decisions carry significant regulatory implications that affect aircraft airworthiness, insurance coverage, and potential liability. Understanding these legal dimensions is essential for informed decision-making.
Key regulatory considerations include:
- FAR Part 43 Requirements: Specifies who can perform maintenance and what constitutes major alterations requiring Form 337
- Equipment Certification Standards: TSO (Technical Standard Order) compliance requirements
- Documentation Requirements: Proper 337 forms, logbook entries, and weight and balance updates
- Airworthiness Implications: Improper installations may invalidate airworthiness certificates
- Liability Exposure: Personal liability for failures or accidents related to installation issues
If you plan to use imported radio equipment, be aware of customs import regulations and international radio equipment rules that may affect both legality and warranty.
Technical Risk Assessment
The technical complexity of modern aviation radio systems creates numerous potential failure points. This section analyzes the technical risks in both installation approaches and how they can be identified and mitigated.
Technical risk factors include:
- System Integration Challenges: Modern radios often interface with multiple aircraft systems
- Power System Loading: Inadequate power system analysis can lead to operational failures
- Interference Management: RF and electrical interference can significantly degrade performance
- Failure Mode Complexity: Digital systems have more complex and less obvious failure modes
- Troubleshooting Difficulty: Intermittent issues can be extremely difficult to diagnose
When selecting your radio, consider power management features including auto-shutoff settings that balance convenience with emergency readiness to prevent battery depletion during critical operations.
Regulatory Requirements and Documentation Guide
Regardless of installation approach, regulatory compliance requires specific documentation and procedures. This section provides a comprehensive guide to the regulatory requirements for aviation radio installations across different aircraft categories.
Documentation Requirements by Aircraft Category
Documentation requirements vary significantly based on aircraft certification category. This comprehensive guide organizes requirements by aircraft type to ensure you understand exactly what documentation is needed for your specific situation.
Standard Category Aircraft:
- FAA Form 337 for major alterations (required for most radio installations)
- Logbook entries with specific references to applicable FARs
- Weight and balance updates with new equipment
- Equipment approval documentation (TSO or STC references)
- Maintenance manual updates if applicable
Experimental/Amateur-Built Aircraft:
- Logbook entries documenting the installation
- Operating limitations compliance verification
- Equipment manuals and documentation
- Wiring diagrams and installation documentation
Light Sport Aircraft:
- Manufacturer-specific authorization if required
- Logbook entries with appropriate references
- Weight updates and equipment list revisions
Testing and Verification Procedures
Proper testing and verification are critical to ensuring installation quality and regulatory compliance. This comprehensive testing protocol ensures your radio installation functions correctly and safely before flight.
Essential Testing Procedures:
- Power System Testing: Verify voltage under load, proper circuit protection
- Transmitter Output Testing: Confirm proper power output and frequency accuracy
- Receiver Sensitivity Testing: Verify reception quality and range
- Antenna System Testing: Check SWR (Standing Wave Ratio) and radiation pattern
- Interference Testing: Check for RF interference with other aircraft systems
- Ground Testing: Comprehensive communication check with ground stations
- Flight Testing: Operational verification in actual flight conditions
Document all test results with specific measurements, dates, and verification methods. This documentation serves both regulatory and troubleshooting purposes.
DIY Installation Skills Self-Assessment
Successful DIY radio installation requires specific skills and knowledge. This honest self-assessment will help you evaluate your capabilities and identify areas for skill development before attempting installation.
Essential Skills and Knowledge Requirements
Successful DIY radio installation requires a specific set of technical skills and knowledge areas. This comprehensive overview helps you understand each required capability and how to develop it.
Critical Skill Areas:
- Electrical Theory: Understanding voltage, current, resistance, and basic circuit analysis
- Wiring Techniques: Proper wire selection, routing, securing, and termination
- Connector Fabrication: Proper crimping, soldering, and connector assembly
- Documentation Skills: Creating and maintaining accurate installation records
- Testing Methodology: Systematic approach to verification and troubleshooting
- Regulatory Knowledge: Understanding applicable FARs and compliance requirements
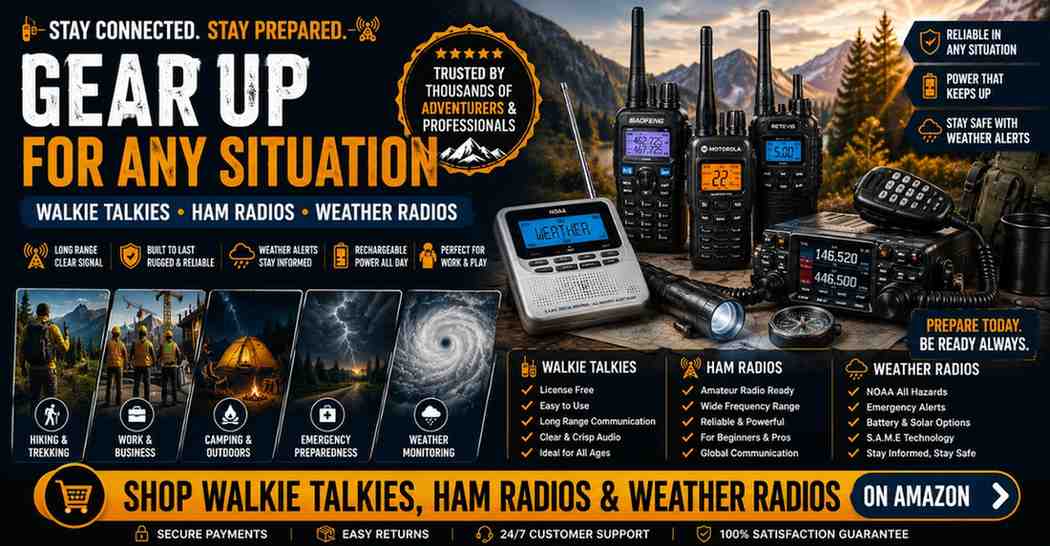
For beginners looking to gain experience before tackling complex installations, starting with budget-friendly handheld aviation radios under $200 can provide valuable learning opportunities with lower risk.
Tools and Equipment Requirements
Proper tools and equipment are essential for safe and effective DIY radio installation. This comprehensive guide covers all necessary items from basic hand tools to specialized testing equipment.
Essential Tools:
- Basic Hand Tools: Quality wire strippers, crimpers, screwdrivers, pliers
- Electrical Testing: Digital multimeter with voltage, resistance, and continuity functions
- Specialized Avionics Tools: Pin extraction tools, D-sub connector crimpers
- RF Testing Equipment: SWR meter, wattmeter (can sometimes be borrowed)
- Documentation Tools: Camera, notepad, label maker
- Safety Equipment: Eye protection, proper lighting, anti-static measures
Quality tools make a significant difference in installation reliability. Budget for proper tools rather than improvising with inappropriate substitutes.
DIY Implementation Guide: Step-by-Step Process
For those who have determined DIY installation is appropriate for their situation, this comprehensive implementation guide provides a structured approach to ensure safety, quality, and regulatory compliance throughout the process.
Pre-Installation Planning and Preparation
Proper planning prevents most installation problems. This comprehensive preparation guide ensures you have everything necessary before beginning the physical installation process.
Planning Checklist:
- Documentation Gathering: Collect all equipment manuals, aircraft wiring diagrams, and installation guides
- Equipment Verification: Confirm all equipment is appropriate for your aircraft and compatible with existing systems
- Create Installation Plan: Develop detailed mounting, wiring, and testing plans
- Materials Acquisition: Purchase all necessary wire, connectors, circuit protection, and mounting hardware
- Tool Inventory: Ensure all required tools are available and in good condition
- Workspace Preparation: Set up adequate lighting, power, and work surfaces
- Aircraft Preparation: Properly secure aircraft, disconnect battery, and protect surfaces
Allow 2-3 times your estimated installation time for unexpected challenges. Most DIY installations take longer than initially planned.
Installation Procedure and Best Practices
Following a systematic installation process ensures safety and quality. This comprehensive procedure guide walks through each installation step with critical best practices and warnings.
Installation Sequence:
- Power System Preparation: Identify power source, install circuit protection, run power wires
WARNING: Always fuse both positive AND ground wires in aircraft installations - Equipment Mounting: Secure radio and control heads in planned locations
CAUTION: Verify adequate ventilation and accessibility - Wiring Installation: Run wires following planned routes
CRITICAL: Maintain separation between signal wires, power wires, and RF cables - Connector Fabrication: Carefully prepare each connector
TIP: Take photos before disassembling existing connectors - Antenna Installation: Mount antenna in optimal location
WARNING: Proper grounding is essential for antenna performance - Initial Testing: Verify basic functionality before final assembly
CAUTION: Use reduced power for initial tests - Final Assembly: Secure all components, label wires, and finalize installation
Document each step with photographs. These will be invaluable for troubleshooting and future maintenance.
Testing, Troubleshooting, and Documentation
Proper testing, troubleshooting, and documentation are critical final steps that ensure your installation is safe, functional, and compliant. This comprehensive guide ensures nothing is overlooked in these crucial phases.
Testing Protocol:
- Visual Inspection: Examine all connections, routing, and mounting
- Power System Verification: Check voltage at radio under both receive and transmit loads
- Functional Testing: Verify all radio functions operate correctly
- RF Output Testing: Measure power output and SWR if equipment available
- Range Testing: Conduct ground tests with distant stations
- Interference Testing: Check for interference with other aircraft systems
- Flight Testing: Conduct supervised test flight in local area
Documentation Requirements:
- Complete logbook entry with specific references to work performed
- Equipment list update with model numbers and serial numbers
- Weight and balance update if applicable
- Wiring diagram showing installation details
- Test results documentation
Selecting and Working with Professional Installation Shops
When professional installation is the appropriate choice, selecting the right shop and effectively managing the process significantly impacts cost, quality, and timing. This comprehensive guide helps you make an informed selection and optimize the professional installation experience.
Evaluating and Selecting Quality Avionics Shops
Not all avionics shops provide the same quality, value, or customer experience. This comprehensive evaluation framework helps you identify truly excellent installation providers and avoid potential problems.
Shop Evaluation Criteria:
- Certification and Qualifications: Repair Station Certificate, technician credentials
- Experience with Your Aircraft: Familiarity with your specific make and model
- References and Reputation: Customer reviews, local pilot feedback
- Facility Inspection: Organization, cleanliness, equipment quality
- Communication Quality: Clarity, responsiveness, willingness to explain
- Documentation Practices: Quality of paperwork, attention to detail
- Warranty Policies: Coverage duration and scope
Red Flags to Watch For:
- Reluctance to provide detailed quotes or references
- Unusually low price estimates compared to other shops
- Poor organization or messy work areas
- Vague answers to specific technical questions
- Pressure to add unnecessary equipment or services
Maximizing Value from Professional Installation
Getting maximum value from professional installation requires strategic planning and effective communication. This comprehensive guide helps you minimize costs while ensuring quality and building a productive relationship with your avionics provider.
Value Optimization Strategies:
- Preparation: Provide complete aircraft documentation and clear requirements
- Scheduling: Book during slower seasons for better rates and attention
- Bundling: Combine multiple avionics projects for efficiency
- Parts Sourcing: Discuss options for owner-provided vs. shop-provided parts
- Clear Communication: Establish expectations and change order procedures
- Progress Monitoring: Request regular updates without micromanaging
- Quality Verification: Conduct thorough acceptance testing before final payment
Establish a collaborative relationship rather than an adversarial one. The best results come from mutual respect and clear communication.
Case Studies: Real-World Installation Experiences and Outcomes
Real-world experiences provide valuable insights beyond theoretical analysis. These detailed case studies examine actual installation projects, both DIY and professional, with honest assessments of costs, challenges, and outcomes.
DIY Success and Challenge Stories
These authentic DIY installation experiences reveal both the potential rewards and challenges of owner-performed radio work. Each case study provides a transparent look at the entire process from planning to completion.
Case Study 1: Experimental Aircraft COM Radio Installation
- Aircraft: RV-7 Experimental
- Equipment: Garmin GTR 200 COM radio
- Owner Experience: Electrical engineer with moderate aircraft experience
- Total Cost: $1,450 ($950 radio + $500 tools/materials)
- Time Investment: 22 hours total (planned for 12)
- Challenges: Interference issues required extensive troubleshooting and rewiring
- Outcome: Successful installation with excellent performance after resolving issues
- Key Lesson: “Proper grounding and wire routing is critical. I spent 50% of my time fixing problems that could have been avoided with better planning.”
Case Study 2: LSA Radio Replacement Attempt
- Aircraft: Tecnam P2008 Light Sport
- Equipment: Icom A220 replacement
- Owner Experience: Private pilot with basic electrical knowledge
- Outcome: Abandoned after encountering integration issues with existing audio panel
- Final Cost: $350 in tools/materials + $1,200 professional completion
- Key Lesson: “Understanding system integration is crucial. What seemed like a simple replacement became complex when dealing with the existing audio system.”
Professional Installation Experiences and Outcomes
Professional installation experiences vary widely in cost, quality, and customer satisfaction. These diverse case studies reveal what to expect, how to ensure positive outcomes, and lessons learned from various approaches to working with avionics professionals.
Case Study 1: Cessna 172 COM/NAV Upgrade
- Aircraft: Cessna 172N
- Project: Garmin GNC 255 COM/NAV installation
- Shop: Regional avionics specialty shop
- Total Cost: $4,850 ($2,400 equipment + $2,450 labor/materials)
- Timeline: Quoted 5 days, actual 7 days
- Value-Added: Shop identified and fixed pre-existing wiring issues
- Key Lesson: “Choosing a shop with Cessna experience made a huge difference. They knew exactly where to look for common problems.”
Case Study 2: Piper Arrow Multiple Radio Upgrade
- Aircraft: Piper Arrow
- Project: Complete panel upgrade with dual COMs
- Shop: FBO with avionics department
- Total Cost: $15,800
- Timeline: Quoted 3 weeks, actual 7 weeks
- Issues: Poor communication, unexpected additional charges
- Key Lesson: “Get everything in writing, including how change orders are handled. My biggest frustrations came from surprise charges and timeline extensions.”
Decision Framework: Making Your Final Installation Choice
With comprehensive understanding of costs, risks, regulatory requirements, and implementation options, this final decision framework helps you synthesize all factors into a clear installation strategy tailored to your specific situation.
Primary Decision Factors (Weight in Order of Importance):
- Regulatory Compliance (Critical): Can you legally perform the installation?
- Safety Implications (Critical): Does the installation affect critical flight systems?
- Technical Capability (High): Do you have the necessary skills and knowledge?
- Equipment Complexity (High): How sophisticated is the system being installed?
- Cost Considerations (Medium): What is the true cost difference after all factors?
- Time Availability (Medium): Can you commit sufficient time to complete properly?
- Long-term Implications (Medium): How will this decision affect aircraft value and future upgrades?
Hybrid Approaches to Consider:
- Professional Design/DIY Execution: Have a shop create the installation plan but perform work yourself (for experimental aircraft)
- DIY Prep/Professional Completion: Do preliminary installation work but have professionals complete final connections and testing
- Supervised DIY: Work alongside a professional for guidance (some shops offer this for experimental aircraft)
Final Decision Checklist:
- Have I honestly assessed my technical capabilities?
- Have I accounted for all costs in both scenarios?
- Do I understand the regulatory requirements completely?
- Have I evaluated the safety implications objectively?
- Do I have contingency plans if problems arise?
- Have I considered the long-term implications of my decision?
The best decision balances regulatory compliance, safety, capability, and costs in a way that suits your specific situation. There is no universal “right answer” that applies to everyone.
For most standard category aircraft owners, professional installation provides the best combination of regulatory compliance, safety assurance, and long-term value. For experimental aircraft owners with appropriate technical skills, DIY installation can provide significant cost savings when approached with proper preparation and realistic expectations.