When disaster strikes, communication often fails first. During emergencies, a reliable way to talk with family or teammates can make the difference between safety and serious danger. Modern walkie talkies offer specialized emergency features designed to work when other systems fail. These tools can serve as lifelines during critical situations.
According to the Federal Emergency Management Agency (FEMA), communication breakdown is the number one reported challenge during emergency response situations. Walkie talkies with proper safety features provide reliable communication when cell networks become overwhelmed or unavailable.
| Photo | Popular Portable Walkie Talkies | Price |
|---|---|---|
 | SKIWARRIOR Multifunctional Smart Wireless Ski Goggles with Walkie-Talkie, Anti-Fog Zeiss Lens, Music & Call Function (Cylindrical Blue) | Check Price On Amazon |
 | SINORISE Super Mini Walkie Talkies, Two-Way Radios, 3 Pack | Check Price On Amazon |
 | KOSPET Tank M4C Smart Watch Rugged, Dual-Band GPS, 5ATM & IP69K Waterproof | Check Price On Amazon |
 | Retevis RT15 Walkie Talkies 3 Pack, Birthday Gift, Outdoor Adventure Kit | Check Price On Amazon |
 | Rechargeable Walkie Talkies Toys for Kids: DIY Astronaut Walkie Talkies for Boys Christmas Birthday Gifts for 3 4 5 6 7 8 9 10 Boy Walkie Talkie Outdoor Hiking Toy 2 Way Radio Camping Outdoor Game | Check Price On Amazon |
This guide shows you exactly how to use walkie talkie safety features to maintain reliable communication during any emergency. You’ll learn about emergency buttons, weather alerts, dedicated channels, and creating comprehensive communication plans that work for your whole family.
Understanding Walkie Talkie Emergency Features: What You Need to Know First
Before diving into specific emergency protocols, let’s establish a clear understanding of the essential safety features available on modern walkie talkies and how they can serve as lifelines during critical situations.
Modern walkie talkies include several dedicated emergency features designed to function during crisis situations. These features provide quick access to help and critical information when standard communication might be difficult or impossible.
Key emergency features include:
- Emergency Alert Button: A dedicated button that sends a loud alert tone to other radios in your group, signaling an emergency situation without requiring voice communication.
- Weather Alerts: Built-in receivers for NOAA Weather Radio broadcasts that automatically notify you of severe weather warnings in your area.
- SOS Siren: A loud audible alarm that can help rescuers locate you or scare away threats in wilderness situations.
- Emergency Channels: Dedicated frequencies monitored by emergency services or other users specifically for distress calls.
- Auto-Channel Scan: Quickly cycles through channels to find active communications during emergencies.
These features vary across different walkie talkie types:
- FRS (Family Radio Service): Basic consumer radios with limited range but simpler operation. Many include weather alerts and emergency buttons.
- GMRS (General Mobile Radio Service): More powerful radios requiring an FCC license, often with enhanced emergency features and better range.
- Commercial Two-Way Radios: Professional-grade devices with advanced emergency features like man-down alerts and GPS location sharing.
The FCC regulates emergency channel usage, with specific frequencies designated for distress calls. For example, Channel 9 is the official emergency channel for CB radios, while GMRS/FRS radios typically use Channel 20 with no privacy codes for emergency communication.
The Critical Difference Between Standard and Emergency Features
Not all walkie talkie features are created equal when it comes to emergency situations. Understanding the difference between standard communication functions and true safety features can be critical when seconds count.
| Standard Features | Emergency Features |
|---|---|
| Regular call button | Emergency alert button (dedicated hardware) |
| Manual channel selection | One-touch emergency channel access |
| Standard volume control | SOS siren (high-decibel alarm) |
| Basic channel scanning | Weather alert monitoring (always active) |
| Regular battery indicator | Critical battery alerts |
True emergency features typically include dedicated hardware components that work independently from regular functions. For instance, emergency alert buttons often work even when the radio is in standby mode, while standard calling features require the radio to be fully powered and properly configured.
In high-stress situations, emergency features provide simpler operation—often requiring just a single button press rather than navigating menus. This distinction becomes crucial when you’re injured, panicked, or operating in poor visibility conditions.
Emergency Alert Buttons and SOS Features: How They Work and When to Use Them
Emergency alert buttons and SOS features provide instant communication when you or someone in your group is in danger. Here’s exactly how these features work and the specific situations when you should activate them.
Emergency alert buttons send a distinctive signal to all compatible radios within range, immediately notifying others of an urgent situation. This alert bypasses normal communication channels and often includes unique tones that cut through background noise.
Here’s how to activate emergency alerts on most walkie talkies:
- Locate the emergency button – Usually colored red or orange and sometimes protected by a cover to prevent accidental activation.
- Press and hold the button – Most radios require a 3-5 second press to prevent false alarms.
- Wait for confirmation tone – Your radio will typically emit a tone confirming the alert has been sent.
- The radio automatically transmits – Many systems then open your microphone for hands-free communication.
- Other radios in your group receive alert tones – Their displays typically show which unit activated the alert.
Visual indicators that an emergency transmission is active include:
- Flashing LED lights (typically red)
- Emergency icons on the display screen
- Unit ID or name of the person sending the alert
- Automatic display wake-up even if the receiving radio was in standby mode
Use emergency alerts only in genuine emergency situations such as:
- Medical emergencies requiring immediate assistance
- Becoming lost or separated from your group
- Encountering dangerous wildlife or threatening situations
- Injuries that prevent normal radio operation
- Dangerous weather conditions requiring immediate response
Different manufacturers implement these features differently. Motorola typically uses a dedicated top button, while Midland often places the emergency button on the front face with an orange color. Always test these features before heading out and make sure all group members know how to both send and respond to alerts.
Weather Alert Systems: Preparing for and Responding to Environmental Hazards
Weather alert systems on walkie talkies can provide critical advance warning of dangerous conditions, giving you precious time to prepare and respond appropriately.
Many modern walkie talkies include built-in NOAA Weather Radio receivers that monitor government weather broadcasts 24/7. These systems can automatically alert you to severe weather even when your radio isn’t being actively used for communication.
NOAA Weather Radio broadcasts provide several types of alerts:
- Watch: Conditions are favorable for dangerous weather (be prepared)
- Warning: Dangerous weather is imminent or occurring (take action)
- Advisory: Weather conditions may cause significant inconvenience (use caution)
- Emergency: Extremely dangerous situation requiring immediate action
To set up weather alerts on your walkie talkie:
- Access the menu system – Usually through a “MENU” or “FUNC” button
- Navigate to weather or WX settings – This varies by manufacturer
- Enable weather scanning – Allows the radio to monitor all weather channels
- Turn on weather alerts – Enables automatic notifications
- Select alert type – Choose which types of alerts will trigger notifications
- Set alert volume – Ensure it’s loud enough to wake you if sleeping
When you receive a weather alert:
- Stop and listen to the complete message
- Note the type of alert (watch, warning, advisory)
- Check the affected area to confirm it includes your location
- Note the timeframe for the expected conditions
- Implement your appropriate emergency plan based on the alert type
Weather alert limitations include terrain interference, building materials blocking signals, and limited geographic specificity. Always maintain backup information sources when possible.
Customizing Weather Alerts for Your Location and Activities
Different environments and activities require different weather alert settings. Here’s how to customize your walkie talkie weather alerts for maximum relevance and safety.
Location-specific weather alerts help you focus on conditions that matter for your particular area. Many advanced walkie talkies allow you to program specific SAME (Specific Area Message Encoding) codes that filter alerts to your county or region.
To program location-specific alerts:
- Find your local SAME code at weather.gov/nwr/same
- Access your radio’s weather alert menu
- Select “SAME programming” or “Location codes”
- Enter your local code using the keypad or selector buttons
- Save the setting and test the system
For different activities, adjust your alert thresholds accordingly:
- Hiking: Enable lightning, flash flood, and severe thunderstorm alerts
- Winter Activities: Prioritize blizzard, winter storm, and extreme cold alerts
- Boating: Focus on marine warnings, high wind alerts, and thunderstorm warnings
- Desert Activities: Enable extreme heat, dust storm, and flash flood alerts
Test your customized alert settings monthly by tuning to the weather channel and listening for the weekly test broadcast, typically conducted on Wednesdays.
Emergency Channels and Frequencies: The Complete Protocol Guide
Emergency channels provide dedicated communication pathways during crisis situations. Understanding how and when to use these channels can be the difference between getting help quickly or facing dangerous delays.
Different radio services have designated emergency channels that are monitored more actively than others:
| Radio Type | Emergency Channel | Frequency | Notes |
|---|---|---|---|
| CB Radio | Channel 9 | 27.065 MHz | Officially designated for emergencies by FCC |
| Marine VHF | Channel 16 | 156.800 MHz | International distress and calling frequency |
| FRS/GMRS | Channel 20 | 462.675 MHz | Commonly used for emergencies (no privacy codes) |
| Amateur Radio | Various | Varies by band | Calling frequencies designated by band |
| International Distress | N/A | 121.5 MHz | Aviation emergency frequency |
When using emergency channels, follow these protocols:
- Listen first – Always listen for 30 seconds before transmitting to avoid interrupting ongoing emergency traffic
- Identify clearly – Start with “EMERGENCY” followed by your name and location
- Be concise – Clearly state the nature of the emergency and what help is needed
- Speak slowly – Ensure your message is understood, especially in poor reception areas
- Repeat key information – Location and nature of emergency should be repeated
- Stand by – After your message, say “Standing by for response” and listen
A proper emergency call should follow this structure:
“EMERGENCY, EMERGENCY, EMERGENCY. This is [your name] calling from [specific location]. We have [describe emergency] with [number] persons requiring [type of assistance]. Our coordinates are [GPS coordinates if available]. We are using [describe any visual signals]. EMERGENCY, EMERGENCY, EMERGENCY. Standing by for response.”
Remember that improper use of emergency channels for non-emergencies can result in FCC fines. Only monitor these channels when not in use, and never conduct routine communications on designated emergency frequencies.
Privacy Codes and Emergency Communication: What You Need to Know
Privacy codes can complicate emergency communications if not properly understood. Here’s what you need to know about using—or not using—privacy codes during emergency situations.
Privacy codes (also called CTCSS or DCS codes) don’t actually make your communication private. They simply filter out unwanted traffic on a shared channel. During emergencies, these codes can prevent your messages from reaching potential helpers.
CRITICAL SAFETY INFORMATION: Always set privacy codes to ZERO or OFF when making emergency calls. This ensures your transmission reaches all radios monitoring that channel, not just those with matching privacy codes.
To quickly disable privacy codes in an emergency:
- Switch to your designated emergency channel (typically Channel 20 on FRS/GMRS radios)
- Press the Menu button
- Navigate to the privacy code setting (often labeled “CODE” or “CTCSS”)
- Set the value to “0” or “OFF”
- Transmit your emergency message
A common dangerous misconception is that privacy codes provide security or encryption. They do not. Anyone can hear your transmission by simply turning off privacy codes on their radio. During emergencies, clear communication to the widest possible audience should be prioritized over filtered communication.
Creating an Emergency Communication Plan: Before the Crisis Strikes
The most effective emergency communication happens when everyone knows exactly what to do before a crisis occurs. Here’s how to develop a comprehensive emergency communication plan centered around your walkie talkies.
A well-designed emergency communication plan ensures that everyone in your family or group knows exactly how to use walkie talkies during a crisis. This advance planning eliminates confusion and ensures critical information flows efficiently.
Follow these steps to create your plan:
- Assign communication roles – Designate a primary communicator and backups
- Establish check-in schedules – Set regular times for status reports
- Select primary and alternate channels – Choose channels for normal use and backups
- Create a channel map – Document which channels are used for specific purposes
- Define alert signals – Establish meaning for different tones or patterns
- Prepare message templates – Create scripts for common emergency situations
- Document key information – Record important contact info and emergency resources
- Establish clear protocols – Define exactly what actions to take in different scenarios
Communication role assignments should match individuals’ abilities:
- Primary Communicator: The most calm and clear speaker with good technical understanding
- Message Relay: Person who records and organizes information
- Channel Monitor: Dedicated listener for emergency broadcasts
- Technical Support: Person responsible for battery management and equipment maintenance
Your check-in protocol should include:
- Regular scheduled times (e.g., every hour on the hour)
- Standard format (“This is [name], status is [condition], location is [place]”)
- Missed check-in procedures (what happens if someone doesn’t respond)
- Battery conservation between check-ins
Practice your emergency communication plan monthly with simulated scenarios. Run through different emergency types and practice using the proper channels, protocols, and message formats.
Communication Protocols for Different Emergency Scenarios
Different emergency situations require different communication approaches. This section provides specific walkie talkie communication protocols for various emergency scenarios.
| Emergency Type | Communication Protocol | Priority Information | Special Considerations |
|---|---|---|---|
| Medical Emergency | Direct call on primary channel, switch to emergency channel if no response | Nature of injury, victim status, exact location, first aid being provided | Designate a single communicator to leave hands free for first aid |
| Severe Weather | Weather alert broadcast to all group members | Type of weather threat, estimated time of impact, shelter location | Use shortened transmission to conserve battery in extended events |
| Lost Person | Regular broadcasts on agreed emergency channel | Last known location, description, resources needed, search pattern | Establish clear search grids and radio check-in points |
| Evacuation | Priority alert followed by detailed instructions | Reason for evacuation, route to take, assembly point, accountability system | Confirm receipt of message from all group members |
For each scenario, follow this general communication structure:
- Initial alert: “ATTENTION [group name], this is [your name]. We have a [type] emergency.”
- Situation description: Brief, factual overview of the emergency
- Location information: Precise details about where the emergency is occurring
- Action instructions: Clear directions about what others should do
- Response request: Specific information or assistance needed
- Confirmation: Request acknowledgment from all recipients
Adapt your transmission length to the urgency of the situation. In immediate danger scenarios, use short, direct commands. For developing situations, provide more complete information.
Emergency Power Management: Ensuring Communication When It Matters Most
When emergencies extend beyond a few hours, power management becomes critical for maintaining communication capabilities. Here’s how to maximize battery life and ensure your walkie talkies remain operational when you need them most.
Different battery types offer various advantages in emergency situations:
- Alkaline batteries: Readily available with long shelf life, but heavier and less environmentally friendly
- NiMH rechargeable: Cost-effective for regular use but lose charge during storage
- Lithium batteries: Lightweight with excellent cold weather performance and long shelf life
- Li-ion rechargeable: High capacity but may degrade if stored fully charged
To maximize battery life during emergencies:
- Reduce power output – Lower your transmission power setting when possible
- Minimize transmission time – Keep messages brief and to the point
- Use battery save mode – Enable power-saving features in your radio settings
- Turn off unnecessary features – Disable vibration, screen lighting, and unused bands
- Schedule communication windows – Turn radios off between scheduled check-ins
- Keep batteries warm – Store close to body in cold conditions
Alternate power sources include:
- Solar chargers: Compact panels that can recharge batteries in daylight
- Hand-crank generators: Manual power generation for emergency charging
- Power banks: Portable battery packs that can recharge USB-compatible radios
- Vehicle adapters: Allow charging from car or boat electrical systems
- AA battery adapters: Convert between battery types in compatible radios
Always watch for critical power level indicators. Most walkie talkies provide visual and audible warnings when battery capacity falls below 20%. At this point, implement your power conservation protocol and switch to backup power sources.
Range Optimization: Maximizing Communication Distance During Emergencies
Manufacturer range claims rarely reflect real-world emergency conditions. Here’s how to maximize your actual communication distance when it matters most.
Realistic range expectations vary significantly by environment:
- Urban environments: 0.5-1 mile due to buildings and interference
- Suburban areas: 1-2 miles with fewer obstructions
- Forests/heavy vegetation: 0.5-1.5 miles depending on density
- Open water: 3-6 miles with clear line of sight
- Mountainous terrain: Highly variable; potentially several miles from peak to peak but just yards in valleys
To maximize your communication range:
- Gain elevation – Move to higher ground whenever possible
- Hold the radio vertically – Keep the antenna pointed straight up
- Step away from obstructions – Move clear of buildings, vehicles, and dense vegetation
- Extend the antenna – If your radio has an extendable antenna, fully extend it
- Speak clearly into the microphone – Hold the mic 1-2 inches from your mouth
- Use maximum power setting – Switch to high power when range is critical
Environmental factors affecting range include:
- Weather conditions: Rain, fog, and snow can reduce range by 25-30%
- Electronic interference: Power lines and electrical equipment disrupt signals
- Physical barriers: Buildings, hills, and dense forests block radio waves
- Time of day: Atmospheric conditions can affect signal propagation
When you notice broken transmissions, static, or intermittent reception, you’re approaching maximum effective range. At this point, try to gain elevation or move to a clearer area before communication is completely lost.
Family-Friendly Emergency Communication: Including Children and Vulnerable Individuals
Emergency communication plans must include everyone in your group, including children and individuals with special needs. Here’s how to ensure everyone can effectively use walkie talkies during emergencies.
Adjust your approach based on age and ability level:
- Young children (4-7 years): Focus on simple button operation and basic phrases
- Older children (8-12): Teach channel selection and proper communication protocols
- Teens: Full operational knowledge including troubleshooting
- Elderly users: Focus on simplicity and larger, easier-to-handle radios
- Users with disabilities: Adapt protocols to accommodate specific needs
For children, use these teaching approaches:
- Start with the basics – Teach power, volume, and push-to-talk first
- Use simple language – “Press the big button to talk, let go to listen”
- Practice regularly – Make communication practice a fun game
- Create visual guides – Color-code buttons or add stickers as reminders
- Focus on emergency phrases – Teach simple, effective communication
For users with special needs:
- Hearing impairments: Enable vibration alerts and visual indicators
- Visual impairments: Select radios with tactile buttons and audio confirmations
- Motor limitations: Consider larger radios with easier-to-press buttons
- Cognitive challenges: Create simple, step-by-step visual guides
The “buddy system” enhances safety by pairing vulnerable individuals with more capable users. Each pair maintains regular communication and assists each other during emergencies.
Practice exercises should include real-world scenarios relevant to your family situation, such as getting separated in a store, experiencing severe weather, or handling a medical emergency.
Simple Scripts and Communication Protocols for Non-Technical Users
Clear, simple communication protocols help ensure everyone in your group can effectively use walkie talkies during emergencies, regardless of technical ability.
Create easy-to-remember scripts for common emergency situations:
- Basic check-in: “This is [name]. I am okay. I am at [location].”
- Requesting help: “This is [name]. I need help at [location]. The problem is [brief description].”
- Reporting location: “I can see [landmark]. I am near [description].”
- Medical emergency: “Medical help needed at [location]. The person is [brief description of condition].”
- All-clear message: “This is [name]. The emergency is over. Everyone is safe.”
Create a simple button guide to attach to each radio:
- RED button = Emergency (press for 3 seconds)
- BIG side button = Talk (press to talk, release to listen)
- UP arrow = Volume louder
- DOWN arrow = Volume quieter
- MENU + Channel 1 = Call family
Practice dialogues should be conducted monthly with all family members:
- Basic check-ins: “This is Dad checking in. What is your location?”
- Emergency scenarios: “This is Mom. I need help in the backyard.”
- Weather alerts: “This is Dad. Weather alert. Everyone come to the basement.”
- Family reunification: “Meet at the car in the parking lot.”
Create visual quick-reference cards that can be attached to each radio with simple diagrams showing proper radio position, button functions, and basic communication scripts.
Testing and Maintaining Your Emergency Communication System
Emergency features are only useful if they work when needed. Regular testing and maintenance of your walkie talkie emergency systems are essential components of responsible emergency preparedness.
Follow this testing schedule to ensure reliability:
- Daily checks: Power on test, battery level verification
- Weekly tests: Communication check between all devices, battery replacement rotation
- Monthly drills: Full emergency feature testing, practice scenarios, range verification
- Seasonal maintenance: Complete system check, battery replacement, accessory inspection
For monthly emergency feature testing:
- Weather alert check – Verify alert tones and announcements are audible
- Emergency button test – Test with group using proper testing protocol
- Battery life test – Verify actual operating time meets requirements
- Range check – Confirm communication at maximum required distances
- Antenna inspection – Check for damage or loose connections
- Accessory function test – Verify headsets, speakers, and microphones
Always document your test results, noting:
- Date and time of test
- Features tested
- Pass/fail results
- Issues identified
- Corrective actions taken
- Next scheduled test date
Common problems and solutions include:
- Poor range: Check antenna, increase height, verify proper orientation
- Battery drain: Replace batteries, check for stuck buttons, disable unused features
- Interference: Change channels, move away from electronic sources
- Moisture damage: Use silica gel packets, store in waterproof containers
- Button malfunctions: Clean with compressed air, check for physical damage
After any emergency where your communication system was used, conduct a thorough review to identify strengths and weaknesses in your equipment and protocols.
Comparing Walkie Talkies for Emergency Preparedness: Making the Right Choice
Not all walkie talkies are created equal when it comes to emergency preparedness. This section will help you identify the most important safety features to consider when selecting two-way radios for emergency communication.
| Feature | Budget Models ($20-50) | Mid-Range ($50-120) | Premium ($120+) |
|---|---|---|---|
| Emergency Alert Button | Basic tone alert | Dedicated button with loud alert | Programmable alert with GPS location |
| Weather Alerts | Manual weather channel | NOAA alerts with auto-notification | Programmable SAME county-specific alerts |
| Battery Life | 8-12 hours typical | 12-24 hours with power save | 24-72 hours with extended batteries |
| Water Resistance | Minimal/splash resistant | IPX4-IPX7 water resistant | Fully waterproof IPX7-IPX8 |
| Range (Realistic) | 0.5-1 mile in real conditions | 1-3 miles in real conditions | 2-5+ miles with better antennas |
| Durability | Plastic housing, basic construction | Reinforced cases, rubber armor | Military-grade, impact resistant |
Feature priorities should match your emergency planning needs:
- For family use: Prioritize simplicity, durability, and weather alerts
- For outdoor recreation: Focus on battery life, water resistance, and range
- For community emergency response: Emphasize reliability, compatibility, and advanced alert features
- For urban environments: Consider interference rejection, building penetration, and compact size
When comparing models, consider these practical factors:
- Battery type compatibility: Can it use common battery types in an emergency?
- Charging options: Does it offer multiple charging methods including emergency options?
- Accessory ecosystem: Are spare parts and critical accessories readily available?
- User interface: Is it simple enough for all family members to operate under stress?
- Compatibility: Will it communicate with other radios your group or community uses?
Recommended models for different needs include:
- Family-friendly option: Midland GXT1000VP4 with clear controls and excellent weather alert features
- Outdoor durability: Motorola T800 with Bluetooth connectivity and offline mapping
- Budget-conscious choice: Radioddity FS-T1 with surprising feature set at lower price point
- Premium performance: BaoFeng UV-5R offering advanced features for those with technical knowledge
Remember that the best emergency radio is one that all users can operate effectively. Sometimes simpler is better, especially for family emergency planning.
Integrating Walkie Talkies with Other Emergency Communication Methods
Walkie talkies are most effective as part of a layered emergency communication strategy. Here’s how to integrate two-way radios with other communication methods for comprehensive emergency preparedness.
A complete emergency communication system should include multiple, complementary methods:
- Walkie Talkies: Excellent for local, immediate group communication without infrastructure
- Cell Phones: Good when networks are operational, but often fail in major disasters
- Satellite Phones/Messengers: Work globally but require clear sky view and are expensive
- Emergency Radios: Receive one-way broadcasts with critical information
- Amateur (Ham) Radio: Long-range capabilities but requires licensing and more skill
- Signal Mirrors/Whistles: Non-electronic backup methods for close-range signaling
When determining which communication method to use:
- Assess the situation – Nature of emergency, duration, area affected
- Evaluate infrastructure status – Are cell networks and power grids functioning?
- Consider distance required – Local, regional, or long-distance communication
- Determine urgency – Immediate life safety or general information
- Check battery/power status – Which systems have operational power?
Create a layered communication approach:
- Primary local communication: Walkie talkies (no infrastructure needed)
- Secondary local backup: Cell phones with text messaging (more resilient than calls)
- Information gathering: Emergency radio for weather and emergency broadcasts
- Long-distance communication: Satellite messenger or ham radio if available
- Last resort signaling: Whistles, mirrors, or visual signals
Practice transitioning between different communication methods during your emergency drills. Establish clear protocols for when to switch from one system to another and ensure all family members understand these decision points.
Real-World Emergency Communication: Lessons from Actual Disasters
Examining how walkie talkies have been used in actual emergency situations provides valuable insights for your own emergency planning. These real-world examples highlight both successful practices and lessons learned.
Hurricane Maria: Puerto Rico, 2017
When Hurricane Maria devastated Puerto Rico, cellular networks and power grids were destroyed across the island. Many communities relied on walkie talkies for local coordination of rescue efforts and resource distribution.
What worked: GMRS radios with weather alerts provided advance warning of additional flooding. Community leaders established regular check-in schedules to coordinate aid distribution and medical assistance.
Key lesson: Communities that had established neighborhood emergency communication plans before the disaster responded more effectively than those trying to organize during the crisis. Battery management became critical during the extended power outage.
California Wildfires: Paradise, 2018
During the Camp Fire that destroyed Paradise, California, rapidly changing conditions required immediate evacuation coordination. Several families credited walkie talkies with helping them navigate around fire-blocked roads.
What worked: Families who maintained consistent communication were able to share real-time information about escape routes. Emergency channels helped connect separated family members during the evacuation.
Key lesson: Range limitations became apparent in the heavy smoke conditions. Families that had predetermined meeting points and communication protocols were able to reunite more quickly despite communication difficulties.
Winter Storm Emergency: Texas, 2021
When severe winter storms caused extended power outages across Texas, many communities used walkie talkies to coordinate neighborhood assistance and wellness checks.
What worked: Battery-powered walkie talkies continued functioning when other communication methods failed. Scheduled check-ins helped identify vulnerable residents needing assistance.
Key lesson: Cold temperatures significantly reduced battery life. Users who kept spare batteries warm (inside pockets close to the body) maintained communication much longer than those who didn’t.
Emergency management professionals consistently emphasize these key takeaways:
- Practice and familiarity with equipment before emergencies is critical
- Battery management often determines success or failure in extended events
- Simple, clear communication protocols work better than complex plans
- Regular check-in schedules help maintain accountability and identify needs
- Multiple communication methods provide necessary redundancy
Frequently Asked Questions About Walkie Talkie Emergency Features
We’ve compiled answers to the most common questions about walkie talkie emergency features and protocols to help you maximize your emergency preparedness.
What is the range of emergency walkie talkies in real conditions?
Despite manufacturer claims of up to 36 miles, real-world ranges are much shorter. In urban environments, expect 0.5-1 mile; in suburban areas, 1-2 miles; in open terrain, 2-5 miles. Factors like buildings, trees, hills, and weather significantly reduce range. For emergency planning, always test actual range in your specific environment rather than relying on package claims.
Do I need a license to use emergency channels?
It depends on the radio type. FRS (Family Radio Service) channels don’t require licenses. GMRS (General Mobile Radio Service) channels legally require an FCC license, though in life-threatening emergencies, this requirement is waived. Marine and aviation emergency channels require appropriate licenses for non-emergency use, but can be used by anyone during genuine emergencies.
How do I coordinate emergency communications with family members?
Create a written emergency communication plan including designated channels, check-in times, and meeting points. Assign roles based on ability, practice regularly, and ensure everyone knows how to operate the equipment. Keep laminated quick-reference cards with each radio and establish clear protocols for different emergency types.
What’s the difference between weather alerts and emergency alerts?
Weather alerts are automated notifications about severe weather conditions received from NOAA broadcasts. They’re system-generated and area-specific. Emergency alerts are user-activated signals sent between walkie talkies in your group to indicate someone needs immediate help. Weather alerts warn of potential dangers, while emergency alerts respond to immediate situations.
How do I test emergency features without causing false alarms?
Always announce “This is a test” before and after testing emergency features. Schedule tests during non-peak usage times and notify all group members in advance. For weather alert testing, use the weekly NOAA test broadcasts (typically Wednesdays). For emergency buttons, some radios have a test mode, or you can use a designated test channel separate from actual emergency channels.
Can different brands of walkie talkies communicate in emergencies?
Yes, if they operate on the same frequency bands (FRS or GMRS) and you use matching channels without privacy codes. During emergencies, set privacy codes to zero on all radios. Different brands may have slightly different feature sets, but basic communication will work across brands using the same standards. Test cross-brand compatibility before emergencies occur.
What should I do if my emergency button doesn’t work?
First, ensure you’re holding the button for the full required time (typically 3-5 seconds). If it still doesn’t work, switch to standard transmission and clearly state “Emergency” three times followed by your location and situation. Test emergency buttons monthly to identify problems before actual emergencies. Always have backup communication methods planned.
Are digital or analog walkie talkies better for emergencies?
Both have advantages. Analog radios are simpler to operate, work across brands, and often have better range at the edge of coverage with degrading signal quality. Digital radios offer clearer audio until out of range, better battery life, and advanced features like text messaging. For most family emergency planning, simple analog radios are more than adequate and easier for all users to operate.
Emergency Communication Resources and Further Learning
To further enhance your emergency communication preparedness, we’ve compiled these authoritative resources and learning opportunities.
Official Emergency Resources
- FEMA Ready.gov Communications – Comprehensive guides for family emergency communication planning
- American Red Cross Emergency Preparedness – Disaster planning resources including communication
- NOAA Weather Radio – Complete information on weather alert systems and programming
- FCC Emergency Communications – Regulatory information and emergency communication resources
Training and Certification
- FEMA IS-242.B: Effective Communication – Free online course on emergency communication
- Community Emergency Response Team (CERT) – Local training programs with communication components
- Amateur Radio Emergency Services Training – Advanced communication training
Mobile Apps and Tools
- FEMA App – Weather alerts, emergency checklists, and shelter locations
- Red Cross Emergency App – Comprehensive emergency information and family communication tools
- Ushahidi – Community mapping and reporting for local emergencies
Downloadable Resources
- Family Emergency Communication Plan Template – Fillable PDF for creating your family plan
- NOAA Weather Radio Quick Reference – Channel frequencies and programming guides
- Emergency Radio Procedures – Official protocols for emergency communication
Local resources often provide the most relevant emergency communication training:
- County Emergency Management Offices – Many offer free preparedness workshops
- Amateur Radio Clubs – Local expertise on emergency communication
- Community Preparedness Fairs – Hands-on experience with emergency equipment
- Local Fire Departments – Many provide family disaster planning assistance
Remember that emergency communication skills require regular practice. Schedule monthly drills with your family or group, and update your emergency communication plan at least twice a year to incorporate new information and account for changes in your situation.
| Photo | TOP RATED WALKIE TALKIES | Price |
|---|---|---|
 | Retevis RT628 Kids Walkie Talkies, Toys Gifts for 4-12 Year Old Girl Boy | Check Price On Amazon |
 | Cobra ACXT545 Weather-Resistant Walkie Talkies, Rechargeable, 22 Channels | Check Price On Amazon |
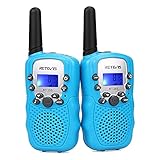 | Retevis RT388 Kids Walkie Talkies, Outdoor Toys for Kids Camping Essentials | Check Price On Amazon |
 | Cobra RX680 Walkie Talkies (2-Pack), IP54 Water Resistant Design | Check Price On Amazon |
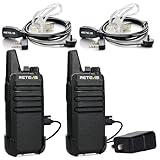 | Retevis RT22 Walkie Talkies Long Range Rechargeable with Earpiece (2 Pack) | Check Price On Amazon |
 | Midland GXT1000VP4 GMRS Two-Way Radios with Headsets, Black, 2 Pack | Check Price On Amazon |
 | Retevis RT628 Walkie Talkies for Kids,Toys Gifts for 6-12 Years Old Boys Girls,Long Range 2 Way Radio 22CH VOX,Birthday Gift,Family Walkie Talkie for Camping Hiking Indoor Outdoor | Check Price On Amazon |