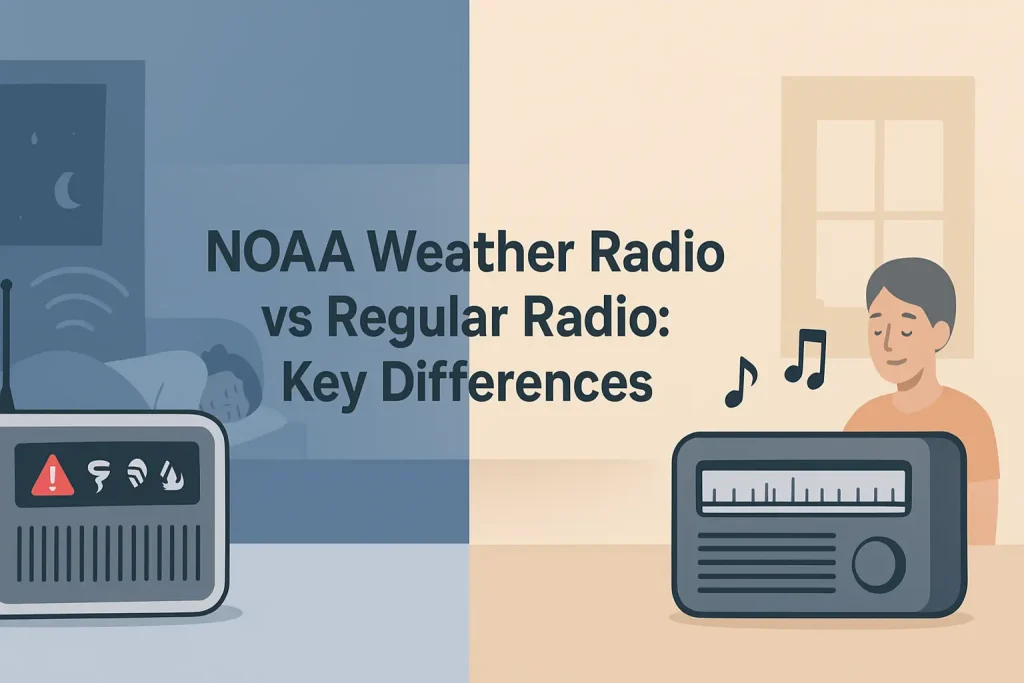
A weather radio sitting in a drawer does nothing. The moment you take it out of the box, plug it in, and program it correctly, it becomes the only device in your home that will wake you up at 3 a.m. when a tornado warning is issued for your county specifically, not for every county in the state. NOAA broadcasts weather alerts 24 hours a day on seven dedicated frequencies between 162.400 and 162.550 MHz, but without S.A.M.E. (Specific Area Message Encoding) programming, your radio will alarm for alerts covering hundreds of miles in every direction.
This guide walks you through every step of setting up a weather radio for the first time, from unboxing to receiving your first county-specific alert.
| Photo | Popular Portable Walkie Talkies | Price |
|---|---|---|
 | SKIWARRIOR Multifunctional Smart Wireless Ski Goggles with Walkie-Talkie, Anti-Fog Zeiss Lens, Music & Call Function (Cylindrical Blue) | Check Price On Amazon |
 | SINORISE Super Mini Walkie Talkies, Two-Way Radios, 3 Pack | Check Price On Amazon |
 | KOSPET Tank M4C Smart Watch Rugged, Dual-Band GPS, 5ATM & IP69K Waterproof | Check Price On Amazon |
 | Retevis RT15 Walkie Talkies 3 Pack, Birthday Gift, Outdoor Adventure Kit | Check Price On Amazon |
 | Rechargeable Walkie Talkies Toys for Kids: DIY Astronaut Walkie Talkies for Boys Christmas Birthday Gifts for 3 4 5 6 7 8 9 10 Boy Walkie Talkie Outdoor Hiking Toy 2 Way Radio Camping Outdoor Game | Check Price On Amazon |
By the Numbers
NOAA Weather Radio – Key Facts for First-Time Users
Sources: NOAA National Weather Service, FCC Part 95, FEMA IPAWS documentation.
What Is a NOAA Weather Radio and Why Do You Need One?
A NOAA weather radio is a dedicated receiver that picks up continuous broadcasts from the National Weather Service on one of seven VHF frequencies between 162.400 and 162.550 MHz. Unlike a smartphone alert, it works during power outages when your phone battery is dead and cellular networks are congested.
According to NOAA’s National Weather Service documentation, the NWR (NOAA Weather Radio All Hazards) network operates over 1,000 transmitters across the United States, broadcasting alerts 24 hours a day, 7 days a week. Coverage reaches roughly 95% of the US population within 40 miles of a transmitter.
The radio receives more than weather alerts. It also carries Civil Emergency Messages, AMBER Alerts, Hazardous Materials Warnings, and National Information Center broadcasts, all encoded through the EAS (Emergency Alert System) and transmitted via the NOAA NWR network.
A weather radio with S.A.M.E. technology lets you program your specific county’s 6-digit FIPS code. The radio stays silent for every alert outside your programmed area and only sounds the alarm for threats that affect you directly.
Without S.A.M.E. programming, your radio will trigger for every alert broadcast from that transmitter, which can cover dozens of counties. That means false alarms at 2 a.m. for areas 200 miles away.
A weather radio is not a substitute for a smartphone, but it is the only alert device that functions without cellular service, internet access, or utility power, assuming you have battery backup installed. For more on how the NOAA network works and what it broadcasts, our overview of how the NOAA weather radio alert system operates nationwide covers the full broadcast infrastructure.
What Equipment Do You Need Before You Start?
You need a weather radio with S.A.M.E. decoding capability, a power source (AC adapter plus battery backup), and your county’s 6-digit FIPS S.A.M.E. code. A radio without S.A.M.E. will receive alerts but cannot filter them to your specific location.
Entry-level S.A.M.E. weather radios from Midland WR120B weather radio cost between $30 and $50 and handle the core functions most households need. Mid-range models like the Midland WR400 weather radio add features like AM/FM reception, USB charging ports, and memory for up to 50 S.A.M.E. codes.
Key Specifications for Entry-Level S.A.M.E. Weather Radio (Midland WR120B):
- Frequency range: 162.400 to 162.550 MHz (all 7 NOAA channels)
- S.A.M.E. alert types: 25 programmable event codes
- Power: AC adapter with 3x AA battery backup
- Alert memory: stores last 14 alerts
- Display: backlit LCD with clock and alert type readout
You also need batteries for backup power. The AA alkaline batteries for backup should be fresh and replaced annually. A dead backup battery means the radio goes silent the moment utility power fails, which is precisely when you need it most.
If you live in an area with frequent power outages, consider a hand-crank emergency weather radio with a solar panel. These models add a manual charging option for extended outages but typically have smaller speakers and fewer S.A.M.E. programming options than plug-in desktop units.
Before you start setup, find your county’s FIPS S.A.M.E. code. You can get it from the NOAA National Weather Service website at weather.gov or from the SAME code lookup tool. Write it down before you begin programming, because some radios time out during entry if you pause too long.
The right equipment for your situation depends on the alert types most common in your region and whether you need portability. That decision is worth thinking through before purchase.
How to Set Up Your Weather Radio for the First Time: Step by Step
Setting up a weather radio for the first time takes 10 to 20 minutes. The exact steps vary by model, but the core sequence is the same: power, channel scan, S.A.M.E. code entry, alert type selection, and alarm test.
According to NOAA NWR documentation, a correctly programmed S.A.M.E. radio should activate only for alerts affecting the specific FIPS county codes you have entered. Every minute you spend on programming directly reduces false alarms.
Here is the step-by-step process for a first-time setup on a standard S.A.M.E. desktop weather radio:
Step-by-Step Guide
How to Set Up a Weather Radio for the First Time
8 steps · Estimated time: 15 minutes · Applies to S.A.M.E.-capable desktop weather radios
Connect AC power and install battery backup
Plug the AC adapter into the wall and insert fresh AA or AAA batteries (check your model’s manual for battery type and count). The radio needs both sources: AC power for daily operation and battery backup to keep working during outages.
Set the clock (if your model has a clock display)
Press and hold the Clock or Time button until the display flashes, then use the arrow keys to set the correct time and date. An accurate clock ensures alert timestamps are correct and some models use the clock to schedule silent periods.
Run an automatic channel scan to find the strongest NOAA signal
Press the Scan or Search button. The radio will cycle through all 7 NOAA frequencies (162.400, 162.425, 162.450, 162.475, 162.500, 162.525, and 162.550 MHz) and lock onto the strongest signal in your area. This takes 10 to 30 seconds depending on the model.
Confirm you are receiving a live NOAA broadcast
Turn up the volume. You should hear a continuous loop of weather information read by an automated voice or, during active alerts, a live meteorologist broadcast. If you hear static only, check the antenna position or manually select a different WX channel number (WX1 through WX7).
Enter your county’s S.A.M.E. FIPS code
Press the SAME or Program button, then enter the 6-digit FIPS code for your county using the number pad. For example, Harris County, Texas uses FIPS code 048201. Confirm the entry and save. Most radios allow you to store 3 to 5 county codes, which is useful if you live near a county border or commute regularly.
Select which alert types will trigger the alarm
Most S.A.M.E. radios let you choose which of the 25+ NWS event codes activate the audible alarm. At minimum, enable Tornado Warning (TOR), Severe Thunderstorm Warning (SVR), Flash Flood Warning (FFW), and Hurricane Warning (HUW). You can also enable Civil Emergency Message (CEM) and AMBER Alert (CAE) if you want those alerts.
Set the alert volume and alarm tone
Set the alert alarm to maximum volume regardless of where you place the radio in your home. The alarm tone for a Tornado Warning is specifically designed to wake sleeping adults, but it requires sufficient volume to penetrate closed bedroom doors. Some models, like the Midland WR400, include a separate programmable alarm volume distinct from the broadcast listening volume.
Run a manual alert test
Press and hold the Test or Alert button to trigger a test alarm. Confirm the alarm sounds at full volume, the display shows the alert type, and the radio returns to normal monitoring mode after you acknowledge it. NOAA also transmits a weekly Required Monthly Test (RMT) signal, usually on Wednesday mornings, which your radio will receive automatically once programming is complete.
After completing all eight steps, your radio should be in monitoring mode, scanning its programmed NOAA channel continuously in the background. The display will show the current time, the active WX channel number, and a signal indicator.
For a more detailed walkthrough of the S.A.M.E. programming menus specific to popular models, the guide on programming S.A.M.E. codes and alert types step by step covers the button sequences for Midland, Uniden, and Sangean units.
Where Should You Place Your Weather Radio?
Place your weather radio where the alarm will wake everyone in the home during overnight hours. A bedroom nightstand or hallway outside bedrooms is the most effective location. A radio in the kitchen or living room will not wake a sleeping household unless the volume is high enough to reach closed bedroom doors.
Antenna position matters more than most first-time users realize. The telescoping antenna on a desktop weather radio should be fully extended and positioned vertically. NOAA NWR transmitters use vertical polarization, so a vertical antenna orientation maximizes signal reception. A collapsed or horizontal antenna can reduce signal strength by 40 to 60% depending on distance from the transmitter.
Avoid placing the radio inside cabinets, behind appliances, or next to large metal objects. Metal surfaces reflect and absorb VHF signals in the 162 MHz band, which can cause intermittent reception or complete signal loss even when a strong transmitter is nearby.
If you live in a basement or a building with concrete walls, you may need to run the antenna lead to a window or an exterior wall. Some desktop weather radios include an external antenna jack (typically 3.5mm or BNC connector) that accepts an external weather radio antenna. An external antenna mounted near a window can recover 10 to 20 dB of signal in difficult reception environments.
The radio should remain plugged in and powered on at all times. It draws very little power in standby mode (typically under 5 watts) and is only useful if it is actively monitoring. Unplugging it when not in use defeats its entire purpose.
Antenna placement and signal strength determine whether your radio receives alerts reliably. Once you confirm strong signal reception, the physical placement decision is complete.
What Are the NOAA Weather Radio Frequencies and Which One Should You Use?
NOAA broadcasts on seven VHF frequencies designated WX1 through WX7: 162.550, 162.400, 162.475, 162.425, 162.450, 162.500, and 162.525 MHz. You do not choose which frequency to use based on preference. Your radio scans all seven and locks onto whichever frequency has the strongest signal from the nearest transmitter in your area.
Each frequency is assigned to specific transmitters by geographic region. The same frequency may be used by transmitters across the country as long as they do not interfere with each other at their respective coverage boundaries. According to NOAA NWR documentation, transmitter power output ranges from 300 watts to 1,000 watts, with coverage radii typically between 25 and 40 miles depending on terrain and antenna height.
If your radio’s automatic scan lands on WX3 (162.475 MHz) and you receive a clear signal, that is your channel. You do not need to change it. If the signal is weak or drops out intermittently, press the channel button to step through WX1 to WX7 manually and identify which frequency gives the clearest reception at your location.
Some areas near state borders or mountain ranges are served by multiple transmitters on different frequencies. In those locations, your radio may pick up alerts from two different NWS offices. Programming your S.A.M.E. county code ensures you only alarm for alerts relevant to your location, regardless of which transmitter’s signal your radio is receiving.
Our full reference on all seven NOAA broadcast frequencies and their regional coverage areas includes a transmitter location map and explains which frequency is strongest in each region of the country.
Use the channel your radio’s scan function selects automatically. That is the strongest signal at your location.
What Is S.A.M.E. Technology and How Does It Work?
S.A.M.E. stands for Specific Area Message Encoding. It is a digital header embedded at the start of every NWR alert broadcast that identifies the geographic area affected, the type of alert, and the alert’s duration. A S.A.M.E.-capable receiver reads this header and compares it to your programmed FIPS county codes before deciding whether to sound the alarm.
According to FEMA’s IPAWS (Integrated Public Alert and Warning System) documentation, the S.A.M.E. protocol uses 6-digit FIPS (Federal Information Processing Standard) codes to identify geographic areas down to the county level. The first two digits identify the state, and the next three identify the county. The sixth digit can subdivide a county into smaller zones in some NWS regions.
When NOAA transmits a Tornado Warning for Harris County, Texas, the digital header contains FIPS code 048201. Your radio reads 048201, matches it against your programmed codes, and triggers the alarm. A radio in the same household programmed for Galveston County (048167) would remain silent for the same alert if the warning does not include Galveston County.
This is why entering the correct FIPS code is the single most important programming step. An incorrectly entered code means the radio either misses alerts for your county or triggers for the wrong county.
S.A.M.E. also encodes the alert type using a 3-letter event code (TOR for Tornado Warning, SVR for Severe Thunderstorm Warning, FFW for Flash Flood Warning). Your radio uses these codes to determine which alerts should trigger the audible alarm versus which should be logged silently. If you have configured your radio to alarm only for TOR, SVR, and FFW, a Marine Small Craft Advisory (SMW) for a coastal county in your area will not sound the alarm even if your county code is included.
For a complete explanation of how S.A.M.E. codes are structured and how to look up your specific county code, the dedicated guide on understanding S.A.M.E. technology and how county-level alerts work covers the full FIPS coding system and programming process.
S.A.M.E. technology is what separates a useful weather radio from an annoying one. Program it correctly and you will only hear alerts that require action.
How to Find Your County’s S.A.M.E. FIPS Code
Your county’s S.A.M.E. FIPS code is a 6-digit number available from the NOAA National Weather Service website at weather.gov/nwr/counties. You can also find it in the instruction manual of most S.A.M.E.-capable weather radios, which typically include a printed FIPS code directory sorted by state and county.
Enter your state in the NOAA lookup tool, then find your county in the alphabetical list. Write down the full 6-digit code before you start programming. Some radios require you to enter all six digits within a few seconds of pressing the confirm button. If you pause too long, the entry times out and you have to start over.
If you live near a county border, or if your workplace or child’s school is in a different county from your home, you can program multiple FIPS codes. Most S.A.M.E. radios support between 3 and 5 county codes simultaneously. The Midland WR400 stores up to 50 S.A.M.E. codes, which is useful for emergency managers or households covering large geographic areas.
Do not guess at your FIPS code or use a neighboring county’s code. An incorrect code means your radio alarms for the wrong area or not at all.
Look up the code from the official NOAA source before you begin any S.A.M.E. programming step.
Which Alert Types Should You Enable on Your Weather Radio?
At minimum, enable Tornado Warning (TOR), Severe Thunderstorm Warning (SVR), Flash Flood Warning (FFW), and Hurricane Warning (HUW) if those hazards are relevant to your region. These four alert types represent the highest life-safety threats covered by the NOAA NWR system and should be active on every weather radio regardless of location.
NOAA broadcasts more than 25 distinct event types through the NWR system. Some, like Marine Small Craft Advisory (SMW) or Special Weather Statement (SPS), are informational and do not represent immediate life-safety threats. Enabling every alert type results in frequent overnight alarms for non-emergency broadcasts, which leads most users to mute or unplug the radio entirely.
The recommended alert configuration for a household weather radio is:
- Enable (audible alarm): Tornado Warning (TOR), Severe Thunderstorm Warning (SVR), Flash Flood Warning (FFW), Flash Flood Emergency (FFE), Hurricane Warning (HUW), Extreme Wind Warning (EWW), Civil Emergency Message (CEM), Hazardous Materials Warning (HMW), Nuclear Power Plant Warning (NUW), AMBER Alert (CAE), Required Monthly Test (RMT)
- Enable (display only, no alarm): Tornado Watch (TOA), Severe Thunderstorm Watch (SVA), Winter Storm Warning (WSW), Blizzard Warning (BZW), Ice Storm Warning (ISW)
- Disable (unless in coastal or marine area): Marine Small Craft Advisory (SMW), Coastal Flood Advisory (CFA), High Surf Advisory (SUA)
Some models use a simplified alert tier system with options like “All Hazards,” “Most Hazards,” or “Life-Threatening Only.” If your radio uses this system, select “Life-Threatening Only” or the equivalent tier that includes tornado and severe weather warnings but excludes marine and watch-level alerts.
The alert configuration decision depends on your geographic location and your tolerance for overnight alarms. A household in tornado alley needs different settings than one in coastal Florida or the Pacific Northwest.
How to Test Your Weather Radio After Setup
After programming your weather radio, run a manual test immediately to confirm the alarm sounds, the display shows the correct alert type, and the radio acknowledges the test correctly. Do not assume the setup is complete until you have confirmed a successful test alarm.
Most S.A.M.E. weather radios include a dedicated Test button. Press and hold it for 3 to 5 seconds. The radio should produce the two-tone EAS alarm signal followed by a test announcement. If the alarm sounds at full volume and the display shows “TEST” or the event code, your setup is correct.
NOAA also transmits two types of regular test signals through the NWR network. The Required Weekly Test (RWT) is transmitted once a week, typically on Wednesday mornings between 11 a.m. and noon local time, and does not trigger audible alarms on most radios. The Required Monthly Test (RMT) is transmitted once a month and includes the full EAS attention signal, which will trigger the alarm on your radio if RMT is enabled in your alert type settings.
If your radio does not respond to the manual test, check the following in order: confirm the radio is in alert monitoring mode (not just playing audio), verify the S.A.M.E. programming was saved correctly, confirm the volume is set to maximum for alert mode, and check that the battery backup is installed correctly.
If the alarm does not sound during a real weekly RMT broadcast after the radio has been running for 30 days, recheck your alert type settings to confirm RMT is enabled. A radio that never alarms during a test signal may have a programming error that also affects real alert reception.
Regular testing confirms the radio is working. Test it once after initial setup and then again after any battery replacement or power outage.
How to Maintain Your Weather Radio Over Time
A weather radio requires minimal maintenance, but two tasks are critical: replacing backup batteries annually and confirming the radio responds to the monthly NOAA test signal. A radio with dead backup batteries will go silent the moment utility power fails, which is precisely the scenario it exists to handle.
Replace backup batteries every 12 months regardless of whether the low-battery indicator has triggered. Alkaline batteries lose capacity over time even without use. The Energizer AA alkaline batteries or equivalent hold a stable voltage for 10 to 12 months in backup standby use, but capacity drops sharply after that point.
Check the signal strength indicator on your radio every few months. NOAA occasionally adjusts transmitter frequencies or power levels during infrastructure upgrades. If your signal strength drops noticeably, run the automatic channel scan again to confirm you are still locked onto the optimal frequency for your area.
After any power outage, confirm the radio’s clock is still accurate if it does not auto-sync. Some older models reset to 12:00 a.m. after a power interruption, which can affect scheduled silent period programming if your model supports it.
If your radio stops receiving alerts or produces static where it previously received a clear signal, our troubleshooting guide on fixing a weather radio that has stopped receiving NOAA alerts covers the most common signal loss and programming failure causes.
For the battery replacement procedure specific to Midland and Uniden models, including the correct battery orientation and how to prevent clock reset during battery swaps, the guide on replacing backup batteries in a weather radio without losing your S.A.M.E. programming covers the process step by step.
Annual battery replacement and a monthly test signal check are the only routine maintenance tasks required for a weather radio to remain fully operational.
Quick Reference
Weather Radio Terms for First-Time Users
Plain-language definitions of key terms used throughout this guide.
What Happens When a Real Alert Comes In?
When NOAA transmits an alert that matches your programmed S.A.M.E. county code and one of your enabled alert types, your weather radio produces the EAS attention signal: a two-tone alarm followed by the alert announcement. This happens automatically, whether the radio is in standby mode or actively playing NOAA audio.
The alarm sequence works as follows. The radio receives the S.A.M.E. digital header in the 8 to 25 seconds before the alert audio begins. It decodes the FIPS county codes and event type embedded in the header. If the codes match your programming, the radio triggers the alarm tone, turns on the display backlighting, and then plays the alert announcement at full volume.
After the announcement ends, most radios continue to display the alert type, the affected counties, and the alert expiration time on the screen. The alarm will silence after a set period (typically 2 to 5 minutes) or when you press the Alarm Reset or Snooze button. Pressing the reset button does not turn off alert monitoring. The radio returns to standby mode and will alarm again if a new alert is issued.
Some radios, including the Uniden BC365CRS weather radio, store the last 14 to 25 received alerts in memory. You can review missed alerts by pressing the Memory or Alert History button, which is useful if the alarm triggered while you were away from home.
During a real Tornado Warning, the recommended action after the alarm sounds is to immediately move to your designated shelter location. The radio will continue broadcasting the NWS message as you move. Do not stay in place waiting for the announcement to finish before taking shelter.
A weather radio alarm is an actionable signal, not an informational one. Treat every alarm as real until you hear the broadcast content confirm otherwise.
Common Mistakes First-Time Weather Radio Users Make
The most common mistake first-time users make is not programming a S.A.M.E. county code at all. A weather radio used without S.A.M.E. programming operates in “all hazards” mode, alarming for every alert broadcast by the nearest NOAA transmitter regardless of location. That transmitter may cover 10 to 20 counties, resulting in overnight alarms for storms that are 150 miles away.
The second most common mistake is placing the radio in a room where the alarm cannot be heard during sleep. A weather radio that cannot wake you at 3 a.m. during a tornado warning provides no life-safety benefit. Place it in a bedroom or hallway, not in the kitchen or office.
A third mistake is relying solely on the battery backup without keeping the radio plugged into AC power. Battery backup is designed to sustain operation during a power outage, not to serve as the primary power source. Running the radio on batteries continuously drains them in 12 to 24 hours, leaving the backup depleted exactly when it is needed.
A fourth mistake is enabling every available alert type. Users who enable all 25+ event codes experience frequent overnight alarms for non-threatening broadcasts like Marine Small Craft Advisories and Special Weather Statements. This leads most users to mute the alarm or unplug the radio, eliminating its usefulness entirely.
A fifth mistake is never testing the alarm. A radio that has never been tested may have a muted alert volume, a programming error in the S.A.M.E. codes, or a failed alarm circuit that was never detected. Test the alarm immediately after setup and confirm it again after each battery replacement.
Avoiding these five mistakes makes the difference between a weather radio that genuinely protects your household and one that sits unused in a cabinet.
How Does a Weather Radio Compare to a Smartphone Alert?
A weather radio and a smartphone wireless emergency alert (WEA) serve overlapping but distinct functions. A smartphone WEA alert requires cellular network connectivity and depends on your carrier’s coverage and network load. A weather radio receives directly from NOAA’s dedicated VHF transmitter network and operates completely independently of cellular infrastructure.
Use the table below to compare the two systems across the factors that matter most during an emergency.
| Factor | NOAA Weather Radio | Smartphone WEA Alert |
|---|---|---|
| Works without cellular service | Yes | No |
| Works during power outage | Yes (with battery backup) | Until phone battery dies |
| County-level alert filtering | Yes (S.A.M.E. programming) | Yes (cell tower location) |
| Wakes sleeping household | Yes (loud EAS alarm) | Only if phone is not silenced |
| Broadcasts continuous updates | Yes (24/7 live NWS audio) | Alert text only |
| Network congestion risk | None | High during major events |
| Cost | $30 to $100 one-time | No additional cost |
The most important difference is reliability during a simultaneous power and cellular outage, which is exactly the scenario most common during severe weather events. A weather radio with fresh backup batteries operates independently of both. FEMA recommends a dedicated NOAA weather radio as part of every household’s emergency preparedness kit for this reason.
Use both systems together, not one instead of the other. They have different failure modes, and redundancy in emergency alerting saves lives.
Can You Use a Portable or Hand-Crank Weather Radio Instead of a Desktop Unit?
Yes. A portable or hand-crank weather radio is a valid alternative to a desktop unit, particularly for camping, travel, or emergency kits where AC power is unavailable. Most portable models receive all 7 NOAA frequencies and include S.A.M.E. decoding capability. The trade-off is smaller speaker volume, shorter battery runtime, and fewer programmable S.A.M.E. county code slots.
The Midland ER310 emergency crank weather radio includes a hand crank, solar panel, USB phone charging port, and S.A.M.E. alert capability in a single portable unit. It operates on 3 AA batteries, solar charging, hand crank charging, or USB input. The speaker output is lower than a desktop unit, so alarm volume in a large home may be insufficient.
Key Specifications for Midland ER310 Portable Weather Radio:
- Frequency range: 162.400 to 162.550 MHz (all 7 NOAA channels)
- Power sources: 3x AA batteries, solar panel, hand crank, USB micro input
- USB output: 1000 mAh charging for smartphones
- S.A.M.E.: Yes, with programmable county codes
- Additional reception: AM and FM broadcast bands
For household use where a desktop unit is an option, the desktop unit is the better choice. It has a larger speaker, louder alarm, more S.A.M.E. code slots, and continuous AC power that preserves battery backup for genuine outages.
For a travel or emergency kit, a portable hand-crank model is appropriate. Both serve the core function of receiving NOAA alerts. The setup procedure is identical.
What Should You Do If Your Weather Radio Is Not Receiving Alerts?
If your weather radio is powered on and scanning its programmed NOAA channel but has not alarmed during a period when alerts were issued in your area, start by confirming the S.A.M.E. FIPS code is entered correctly. An incorrectly entered county code is the most common cause of missed alerts on an otherwise functional radio.
Press the Programming or SAME button to view your stored FIPS codes. Compare each digit against the correct 6-digit code from the NOAA website. Even a single transposed digit will cause the radio to filter out all alerts for your county.
If the FIPS codes are correct, check the signal strength indicator. A weak or intermittent signal may allow the radio to play NOAA audio continuously (which uses error correction) but fail to decode the digital S.A.M.E. header correctly. The S.A.M.E. decoder requires a stronger, cleaner signal than the audio broadcast. Try repositioning the antenna or manually scanning for a stronger NOAA channel frequency.
Also confirm the alert types you have enabled include the event code for the alert you expected to receive. If the alert was a Tornado Watch (TOA) and you have only enabled Tornado Warning (TOR), the radio correctly stayed silent because watches and warnings use different event codes.
For a complete diagnostic sequence covering signal, programming, and hardware failure modes, our troubleshooting guide on diagnosing and fixing a weather radio that missed alerts walks through each failure mode with specific corrections.
Most missed-alert problems are solved by correcting the FIPS code entry. Confirm that first before assuming a hardware fault.
Is the Midland WR120B a Good First Weather Radio?
The Midland WR120B is a reliable entry-level S.A.M.E. weather radio that covers all 7 NOAA frequencies, supports S.A.M.E. county-level alert filtering, and sells for approximately $30 to $40. It is a practical first weather radio for most households that need reliable overnight alert capability without additional features.
Key Specifications for Midland WR120B:
- Frequency: 162.400 to 162.550 MHz (WX1 to WX7)
- S.A.M.E. programmable county codes: 25 event types
- Power: AC adapter with 3x AA battery backup
- Display: backlit LCD with alert type and channel readout
- Alert memory: last 14 alerts stored
The WR120B’s limitations are its small speaker (lower alarm volume than mid-range models), a basic keypad that requires referring to the manual for S.A.M.E. programming, and no AM/FM reception. For a bedroom nightstand placement with the door closed, the alarm volume is adequate. For a unit placed in a central hallway to alert an entire floor, consider stepping up to the Midland WR400, which has a larger speaker and louder alarm output.
The WR120B is the right first weather radio for a budget-conscious buyer who needs S.A.M.E. filtering and reliable overnight alarm capability. It is not the right choice if you need AM/FM reception, USB charging, or a louder alarm for a larger space.
How Do You Know Your Weather Radio Is Working Correctly?
A correctly functioning weather radio will respond to the NOAA Required Monthly Test (RMT) signal by producing the full EAS alarm sequence, displaying the test event code on screen, and returning to normal standby mode after acknowledgment. If your radio does not respond to a monthly RMT broadcast, the alarm or S.A.M.E. decoder is not functioning correctly.
Between monthly RMT broadcasts, you can verify basic operation by pressing the manual Test button. The radio should produce the two-tone EAS signal at the programmed alarm volume. If the alarm sounds but the volume is noticeably lower than it was after initial setup, check the backup batteries. Some radios reduce alarm volume when battery backup is low, even while running on AC power.
A second verification method is to intentionally program a neighboring county’s FIPS code alongside your own and monitor whether the radio distinguishes correctly between alerts affecting your county versus alerts for other counties during a weather event. This confirms the S.A.M.E. decoder is reading and comparing FIPS codes correctly rather than defaulting to all-hazards mode.
If your radio plays NOAA audio clearly but does not respond to test signals or real alerts, the S.A.M.E. decoder circuit may have failed. This is uncommon in new radios but does occur after 5 to 10 years of continuous operation. Replace the radio if the alarm does not trigger on a confirmed RMT broadcast after you have verified all programming settings are correct.
Monthly confirmation of the RMT response is the simplest and most reliable way to know your weather radio is working correctly.
Does Your Weather Radio Need a License to Operate?
No. NOAA weather radios are receive-only devices. They do not transmit on any frequency. FCC licensing applies to radio transmitters, not to passive receivers. You can operate a weather radio anywhere in the United States without any FCC license, registration, or permit.
According to FCC regulations, no individual authorization is required to operate a radio receiver, including weather radio receivers tuned to NOAA NWR frequencies between 162.400 and 162.550 MHz. This distinguishes weather radios from two-way radios (such as GMRS or amateur radio transceivers), which transmit on licensed frequencies and require FCC authorization.
The radio itself must be FCC Part 15 compliant (for unintentional emissions from its electronic components) and Part 68 compliant if it connects to a telephone line, but these certifications are handled by the manufacturer before the product is sold. You do not need to take any action to comply with FCC rules when purchasing and operating a weather radio.
No license is needed. No registration is needed. Purchase, program, and use the radio freely.
What Is the Difference Between a Weather Watch and a Weather Warning on Your Radio?
A weather watch means atmospheric conditions are favorable for a severe weather event to develop. A weather warning means a severe weather event has already been detected by radar or confirmed by a spotter and poses an immediate threat to the affected area. Your weather radio uses different S.A.M.E. event codes for each designation, and you can configure different alarm behaviors for watches versus warnings.
The most important pair to understand is Tornado Watch (TOA) versus Tornado Warning (TOR). A TOA means conditions could produce tornadoes in the next several hours across a broad area. A TOR means a tornado has been detected on radar or sighted on the ground and is an immediate life-safety emergency requiring shelter action.
Most emergency management professionals recommend configuring your weather radio to alarm audibly for all warning-level events and to alert silently (display only, no audible alarm) for watch-level events. This prevents overnight disruptions from watch-level broadcasts that may cover your county for 4 to 6 hours before any actual storm develops, while ensuring you never miss a warning-level alarm.
The event code distinction matters because conditions change. A tornado watch can escalate to a tornado warning within minutes. Having your radio configured to alarm loudly for TOR while silently displaying TOA gives you both situational awareness and uninterrupted rest during lower-threat conditions.
Configure warnings for audible alarm and watches for silent display. That is the setting most household weather radios use for daily long-term operation.
Why Does Your Weather Radio Go Off for Counties You Did Not Program?
If your weather radio is alarming for counties outside your programmed FIPS codes, the most likely cause is that the radio is operating in all-hazards mode rather than S.A.M.E. filtered mode. Some radios default to all-hazards mode out of the box, and entering a FIPS code does not automatically switch the radio into S.A.M.E. mode. You must explicitly activate S.A.M.E. filtering in the programming menu.
On most Midland and Uniden models, the programming sequence requires you to navigate to a SAME On/Off or Alert Mode setting and confirm that S.A.M.E. filtering is active. Simply entering your FIPS code without activating S.A.M.E. mode means the radio stores the code but does not use it to filter alerts.
Check your model’s manual for the exact menu path to confirm S.A.M.E. mode is active. The display on many models shows a “SAME” indicator or icon when S.A.M.E. filtering is engaged. If the display shows “ALL” or no S.A.M.E. indicator, the radio is in all-hazards mode.
A second cause is that the active NOAA transmitter in your area covers a large geographic footprint and is broadcasting an alert that genuinely includes your county along with many others. In this case, the radio is working correctly. The alert is real for your county even though many other counties are also named in the broadcast.
Confirm S.A.M.E. mode is active in the menu settings, not just that the FIPS code has been entered. That step resolves most unwanted county alert problems.
Can You Use One Weather Radio to Cover Two Different Locations?
Yes, if your weather radio supports multiple S.A.M.E. county code slots. Most mid-range and premium models allow you to program 3 to 50 FIPS codes simultaneously. When any programmed county is included in an alert broadcast, the radio alarms. This is useful for households whose members commute between counties or who have family members in different areas they want to monitor.
Programming two county codes does not require any additional hardware or configuration beyond entering both FIPS codes in the S.A.M.E. programming menu. The radio monitors all programmed counties equally and will alarm for alerts affecting any one of them.
The practical limit is how many unrelated counties you program. Programming 10 or more counties can result in alert volume similar to all-hazards mode if the programmed counties are geographically spread across a large state. Keep programmed counties to those where you or immediate family members are physically present regularly.
Two county codes is the standard configuration for a household near a county border. Three to five codes covers a typical multi-county commuter or family scenario. More than five codes approaches all-hazards behavior and partially defeats the purpose of S.A.M.E. filtering.
Program all the counties where you need coverage. Stop before the number of programmed codes creates the same false alarm problem you were trying to solve.
What Happens to Your Weather Radio Programming During a Power Outage?
Your S.A.M.E. county codes, alert type selections, and channel settings are stored in non-volatile memory on most weather radios and are not erased during a power outage. The programming survives even if both AC power and battery backup are completely depleted. When power is restored, the radio resumes operation with all settings intact.
The clock, however, may reset to 12:00 a.m. on models without a real-time clock module with its own battery. If your radio uses the clock for a scheduled silent period (some models allow you to mute the broadcast audio during sleeping hours while keeping the alarm active), check the clock setting after any power interruption longer than a few minutes.
Battery backup exists specifically to maintain full operation during outages, not just to preserve settings. If the backup batteries are fresh, the radio continues receiving NOAA broadcasts and will alarm for alerts throughout the outage. If the batteries are dead or missing, the radio shuts down entirely when utility power fails.
Test the battery backup by unplugging the AC adapter and confirming the radio continues operating on batteries alone. If it shuts off immediately, the batteries need replacement. Our guide on maintaining battery backup in a weather radio so it works during outages covers the replacement procedure and battery selection for the most common desktop models.
Your programming is safe during outages. Your radio’s operation during an outage depends entirely on whether the backup batteries are functional.
How Far Away Can a NOAA Transmitter Reach Your Weather Radio?
A NOAA NWR transmitter operating at 1,000 watts with a high-elevation antenna can provide reliable reception at distances up to 40 miles in flat terrain. Lower-power transmitters (300 watts) typically achieve reliable coverage within 25 miles. NOAA NWR documentation states that approximately 95% of the US population lives within 40 miles of at least one NWR transmitter.
VHF signals in the 162 MHz band propagate primarily by line-of-sight. Hills, mountains, and dense urban building clusters can block or significantly attenuate the signal, reducing effective range to 10 to 15 miles in mountainous or heavily built-up areas. Conversely, flat terrain with no obstructions can extend reliable reception to 50 or more miles from a high-power transmitter.
Indoor reception varies with building construction. Wood-frame homes present minimal signal attenuation. Concrete and steel-reinforced buildings can reduce signal strength significantly, which is why antenna placement near a window or an exterior wall improves reception in those structures.
If you live in a rural area more than 40 miles from the nearest NWR transmitter, reception may be marginal with a standard telescoping antenna. An outdoor-mounted weather radio antenna connected to the radio’s external antenna jack can recover 10 to 15 dB of signal, extending reliable reception range by 15 to 25 additional miles depending on terrain.
Check signal strength on all 7 NOAA channels at your location. Use the channel with the strongest signal indicator regardless of which WX number it corresponds to.
Most users within 40 miles of a transmitter will receive adequate signal with the built-in telescoping antenna positioned vertically near a window.
What Is the Difference Between a Weather Radio and a Weather Alert Radio?
The terms “weather radio” and “weather alert radio” refer to the same class of device. Both receive NOAA NWR broadcasts on 162 MHz frequencies. The distinction in marketing terminology reflects whether the radio includes S.A.M.E. alert filtering capability. A basic “weather radio” may receive NOAA audio continuously without any alert filtering. A “weather alert radio” typically implies S.A.M.E. decoding that allows the radio to alarm only for specified alert types and geographic areas.
In practice, most weather radios sold in the US today include S.A.M.E. decoding as a standard feature. The term “weather alert radio” on product packaging does not guarantee any specific feature set beyond basic NOAA reception. Always check the product specifications for explicit S.A.M.E. support and confirm the number of programmable county codes before purchase.
A radio without S.A.M.E. capability will alarm for every alert transmitted by the nearest NOAA transmitter, which may cover 10 to 20 counties. For most households, this produces enough false alarms to make the radio unusable for overnight alert monitoring. S.A.M.E. capability is the single most important feature to confirm before purchasing a weather radio.
Buy a radio that explicitly lists S.A.M.E. programming with county code entry in its specifications. Any other feature is secondary to that one.
Your weather radio is only as useful as its programming. An unprogrammed radio is background noise. A correctly programmed S.A.M.E. radio with fresh backup batteries, positioned where the alarm can wake everyone in the home, is a reliable early warning system that operates independently of cellular networks, internet connectivity, and utility power. Program it today.
| Photo | TOP RATED WALKIE TALKIES | Price |
|---|---|---|
 | Retevis RT628 Kids Walkie Talkies, Toys Gifts for 4-12 Year Old Girl Boy | Check Price On Amazon |
 | Cobra ACXT545 Weather-Resistant Walkie Talkies, Rechargeable, 22 Channels | Check Price On Amazon |
 | Retevis RT388 Kids Walkie Talkies, Outdoor Toys for Kids Camping Essentials | Check Price On Amazon |
 | Cobra RX680 Walkie Talkies (2-Pack), IP54 Water Resistant Design | Check Price On Amazon |
 | Retevis RT22 Walkie Talkies Long Range Rechargeable with Earpiece (2 Pack) | Check Price On Amazon |
 | Midland GXT1000VP4 GMRS JIS4 Two-Way Radio, Black,2 Pack | Check Price On Amazon |
 | Retevis RT628 Walkie Talkies for Kids,Toys Gifts for 6-12 Years Old Boys Girls,Long Range 2 Way Radio 22CH VOX,Birthday Gift,Family Walkie Talkie for Camping Hiking Indoor Outdoor | Check Price On Amazon |